Monthly Archives: March 2012
ASP.NET | Basic Database Manipulation
You want to add a database table in your web application? want to perform ADD, EDIT, DELETE without learning SQL? Here it is…
Requirements:
-Microsoft Access 2007
-Visual Studio 2010
Before we start connecting and populating our database table data in Visual Studio 2010, first we shall make our database using Microsoft Office Access 2007. Follow the instructions below:
Open Microsoft Office Access 2007. There you’ll see a category “New Blank Database” then click the button with a caption “Blank Database” so that Access 2007 will prepare for a database with no data and table yet.

Now, upon clicking it, on the right corner of Access 2007, you will be asked to input your desired Database name with a default “Database1” value. Change it to “Students” instead. Also, you can specify in which path of your computer it will be saved. By default, it is saved in your computer’s My Documents folder. Change it to drive C:\ instead so that it is easy to locate.


Once you finished specifying the Database name and the location in which the file will be saved, click the “Create” button.

By default, Access created a blank database together with a blank table. Blank table means there’s no data inside it. That table is named “Table1”. We will change it to “Section_P1” as we will be inserting names and data from the students of Section P1.

To rename it, first right-click on the Tab that says “Table1”, and choose Save, so that Access will save the database and prompt you for a different table name.

Once the prompt appears, input “Section_P1”, and then press the Ok button.

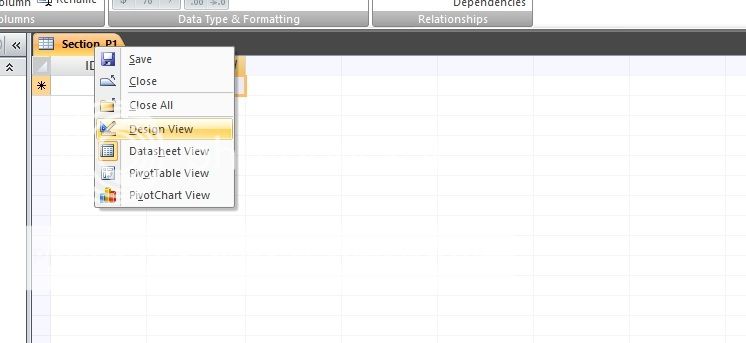
Now that we have renamed the table, it’s time for us to define what types of data our table will hold. To do that, simply right-click on the Section_P1 tab on the upper left part of access, and choose Design View.
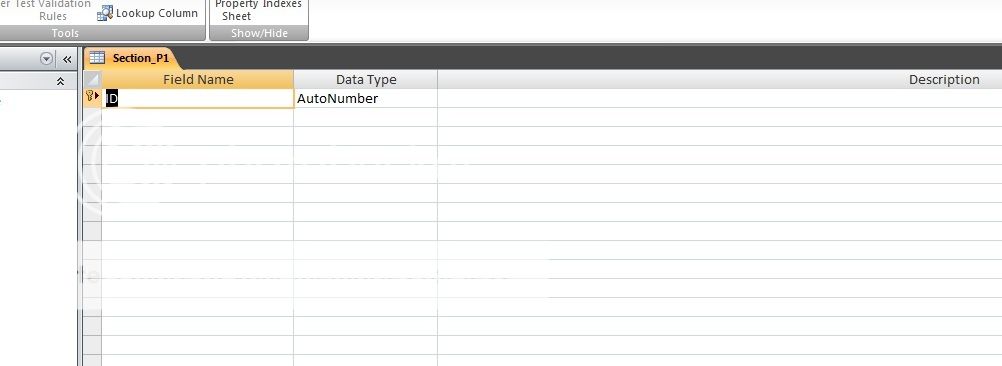
In Design View, we can perform things necessary for our table. We can add, remove or rename fields (in Excel, we call it Columns), specify what types of data a field can hold (numbers, letters, telephone numbers, date), and assign Primary Key (a Field that can hold unique data only). In the newly created table, we are already given one field called “ID”, with AutoNumber data type (meaning, it will automatically insert sequential numbers every time we insert data in other fields). It is also set as the table’s Primary Key, which means that it is not possible to hold data that is already used in the same field.
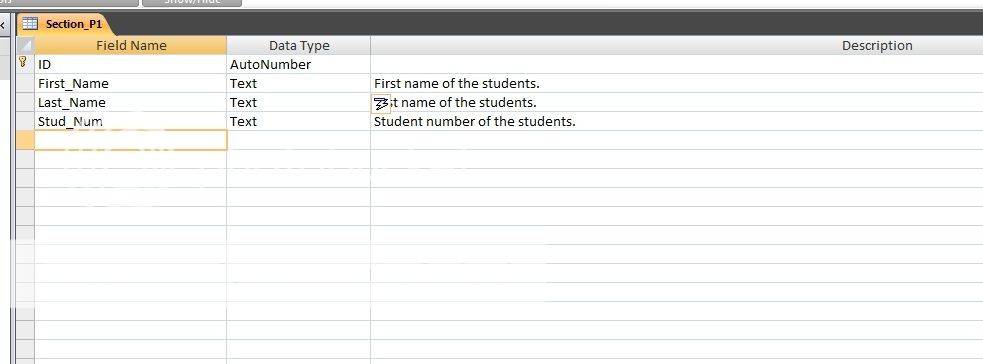
Let’s add 3 more fields in our table. Add more fields based on the information below:
Field Name Data Type
First_Name Text
Last_Name Text
Stud_Number Text
Specifying some values in the Description is optional. By following the information above, your table should contain those fields now, just like the picture below:
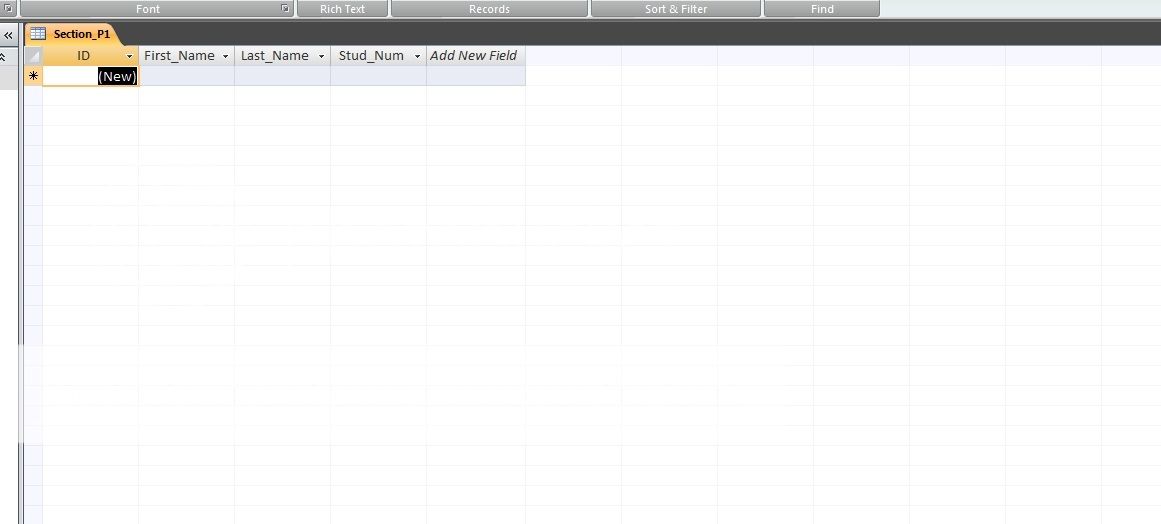
After that, right-click the Section_P1 Table tab on the upper left corner and then choose “Datasheet View” from the menu to go back to the area where you can add data to your table. It is mandatory to save your table first before continuing.

In Datasheet View, you will finally notice that the fields we have added are now appearing in our table.
Now let’s try to add Data in our table. Below is the list of students currently enrolled for the subject CSWD01 section P1. They are names (first name and last name) as well as their student number in alphabetical order. Simply analyze the information and add them to the fields.

After that, your table should be populated like this:

Save it and close Microsoft Access 2007 for now.
The next thing to do is to resume our work in Visual Studio. Load up your Web Application in Visual Studio. Once done, create a new Tab with a title “CSWD01 P1-Students” as well as a web form for it. Refer to the image below:

The form we just created will be the place where we will show the data in our table.
Do you still remember where you save your Database? Coz’ now we will try to connect our database to our project. To do that, in Menu Bar, click Data and then Add New Data Source.

After that, a window will appear in which VS will ask you the type of the data source. By default, the value Database is already selected. Leave it and click Next.

On the next window, you will be asked to choose which Database Model to use. Choose DataSet coz’ that what is needed in our project and click Next.

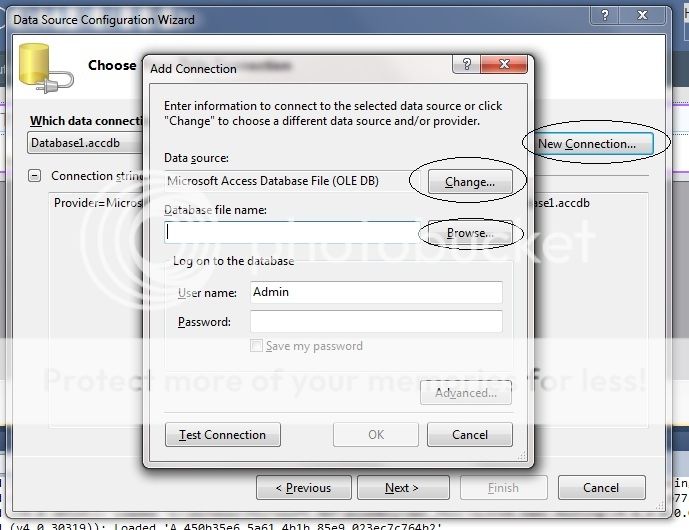
The next window is where you will specify the datasource. By default, the drop-down list is empty so the choice is to click New Connection. Upon clicking it, a new window will appear wherein you can locate your database file as well as the Data Provider to use. In the Data Provider option, choose OLE DB as we are using Microsoft Access Database and not SQL Database. Click the “Browse” button to locate your Database file.
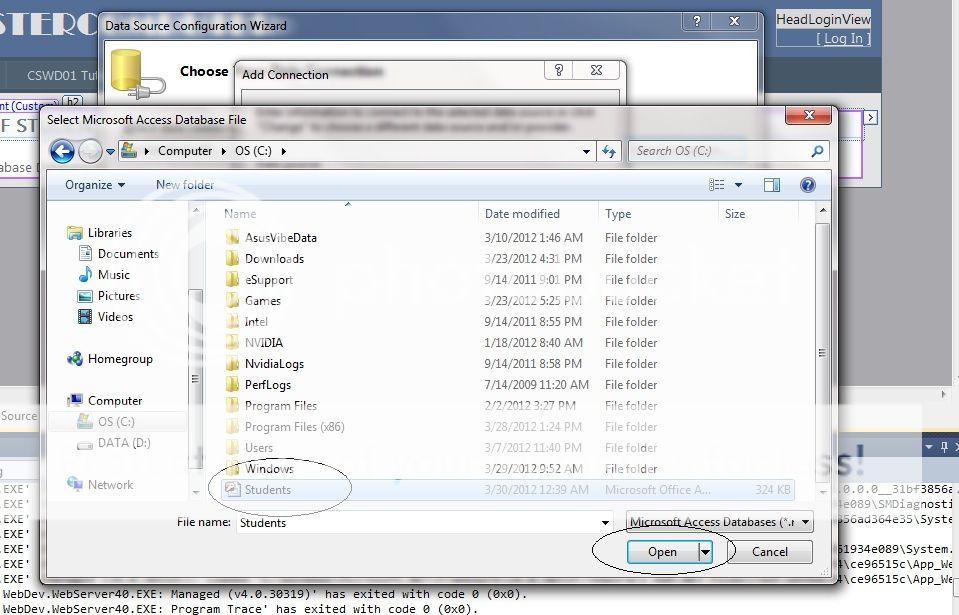
Our Database is saved in drive C:\ so locate the folder C:\ and click on the database file. Finally, click the Open button.
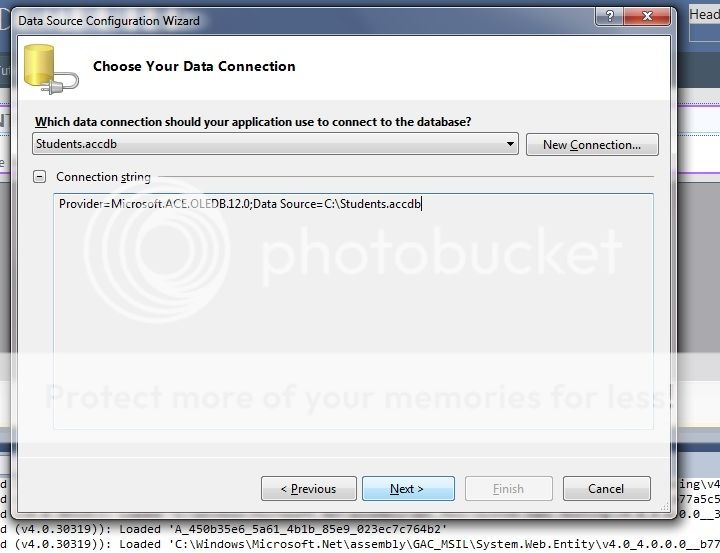
Once opened, optionally you can click the “Test Connection” button to make sure that the project and the database file can establish connection to each other. Otherwise, click the OK button and you will be redirected back to the wizard. Click Next right after that.
Another page from the wizard will appear asking you to save the connection string to the application configuration file. Simply click Next so that you can choose your Database Object that you want to access in your project. Check both “Tables” and “Views” and click Finish.

After that, you will be brought back to your Web Forms.

Now, to add the Database table to your Web Form, simply, on the left corner of VS, in the same place where you can find the ToolBox, click on Server Explorer.

There, you will see a nested category named “Data Connections” wherein a clickable arrow is right before it. Click it to expand, just like how the picture below is:
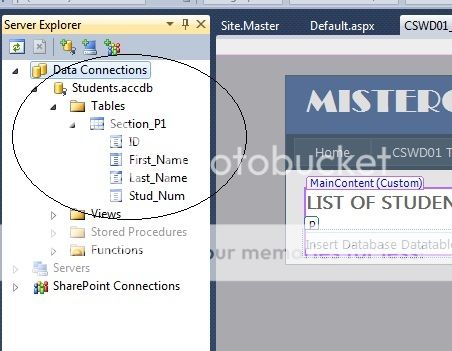
Under Tables, there goes our Section_P1 table and under it is the fields we have created earlier (ID, First_Name, Last_Name, Stud_Num). To insert the Table in our Web Form, simply drag-and-drop the Section_P1 label to an area in our form.

The result should be like this, together with a variety of options we can use to manipulate our database table.

However, by default, our Web Application is not able to modify or perform manipulations like adding data, renaming them and saving them to the database source file. To do that, simply check the following:
Enable Paging – So that if the table has more than a lot of values, VB will redesign it in a page-like view. (Optional)
Enable Sorting – If enabled, you can click the field names/columns to sort data.
Enable Editing – This means that we can edit data already stored in the table and update them right after.
Enable Deleting – If enabled, users can remove rows of data in the table.
Enable Selection – Mandatory. This means that we can select a certain row of data.
Right after that, debug the Application by pressing F5. The resulting page should return something like this:

Now we can manipulate our database table using our web app. Try opening the Database file to see whether your changes in your application works. Take note: originally you database file is stored in C:\. However, as we recall, VB asked us to create a copy of our database file in which that file will be used in the project instead of the file stored in C:\. That file is stored inside your Web Application project folder, in a subfolder called App_Data. In my case, it is stored inside C:\Users\kenokenopi\Documents\Visual Studio 2010\Projects\Dayapan\Dayapan\App_Data\Students.accdb
There you go. Have fun with Database
|> Slipknot – The Heretic Anthem
ASP.NET | Validations
Now since we have already learned how to add a new Web Form or .aspx file in our web site, the next thing to learn is how to add validations in our textboxes and other objects. To do that, read the instructions and example below:
1. Our objective is to add a registration-like form in our web application, so first we add the objects we would like to, like textboxes, labels, etc. First, add a label by dragging and dropping a Label object from the Toolbox (right side in VS2010) to your form, in CSWD01_Tutorial.aspx (design mode) right below the header that says “CSWD01 ASP.NET TUTORIAL”. Once the Label object is in our form, rename it from “Label” to “First Name:”. You can edit the formatting of the text, like font, size and color, but in this tutorial we will just stick with the default formatting supplied by VS.

2. After that, drag and drop a TextBox from the toolbox to the form, 3 spaces right next to the Label we just added.

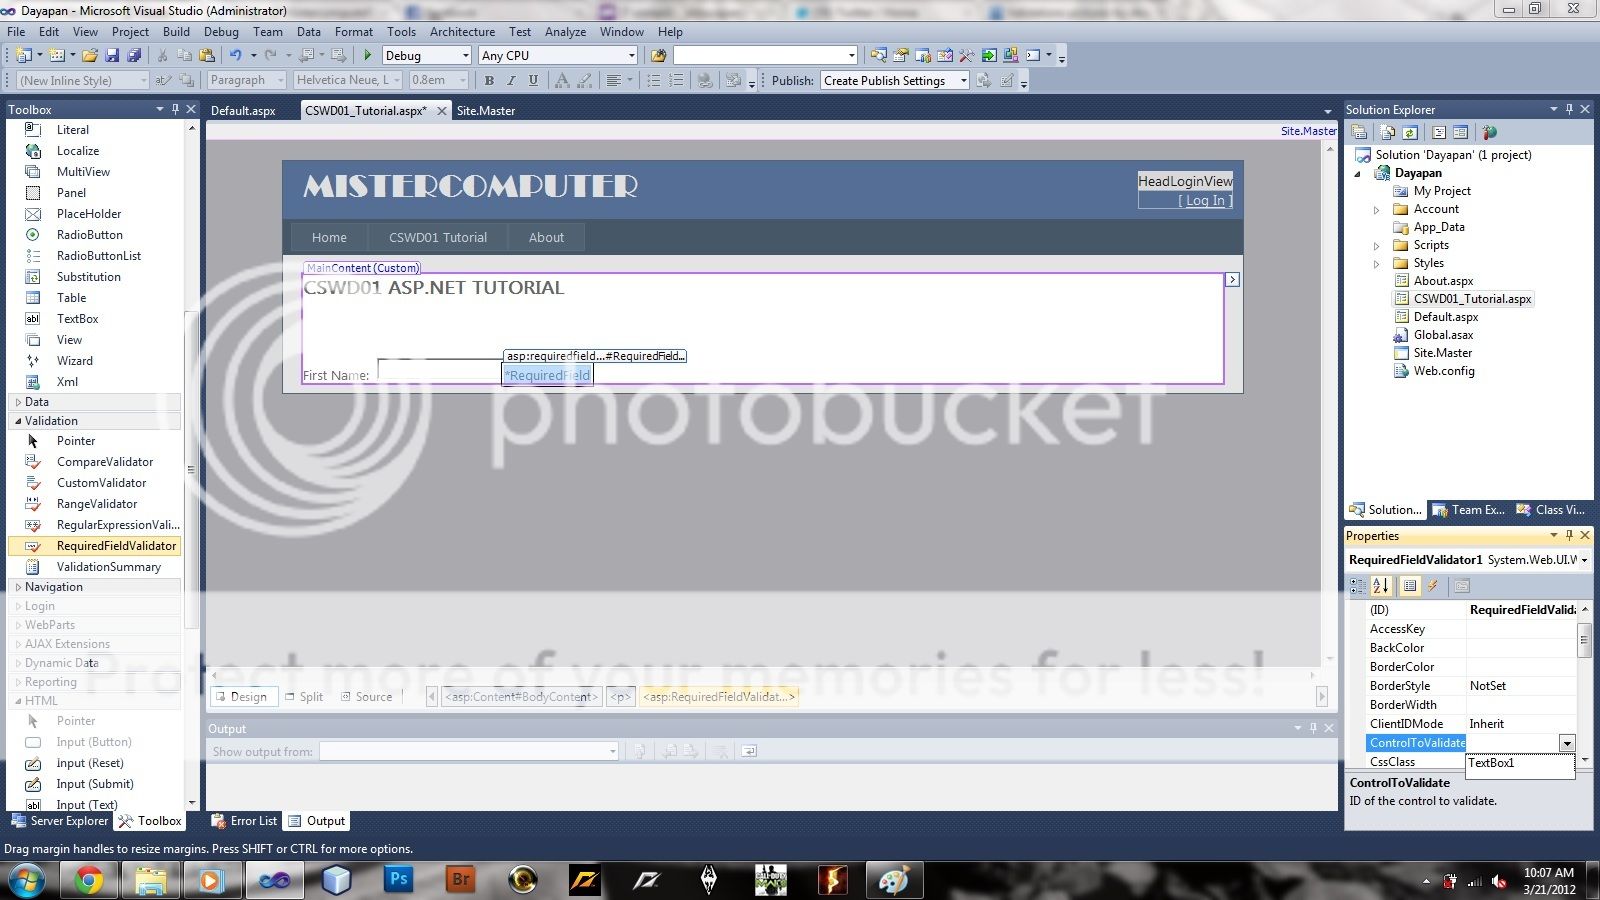
We want users to input data in our textbox before clicking the “Submit” button, meaning, users can’t go on to the next form without their first name left empty. To do that, we will add validations in our objects. In our “First Name” textbox field, we will use the RequiredFieldValidator which can be drag and dropped from the toolbox, under the Validation category.

Now rename the ErrorMessage property value from “RequiredFieldValidator” to “*Required Field”.

Again, in the properties of our RequiredFieldValidator, change the value of ControlToValidate to “TextBox1”, so that our validator will take effect once the value of TextBox1 is empty.
Right after that, we would like to test if our validator works properly. To do that, drag and drop a Button from the Toolbox to our form, below the textbox and the validator.
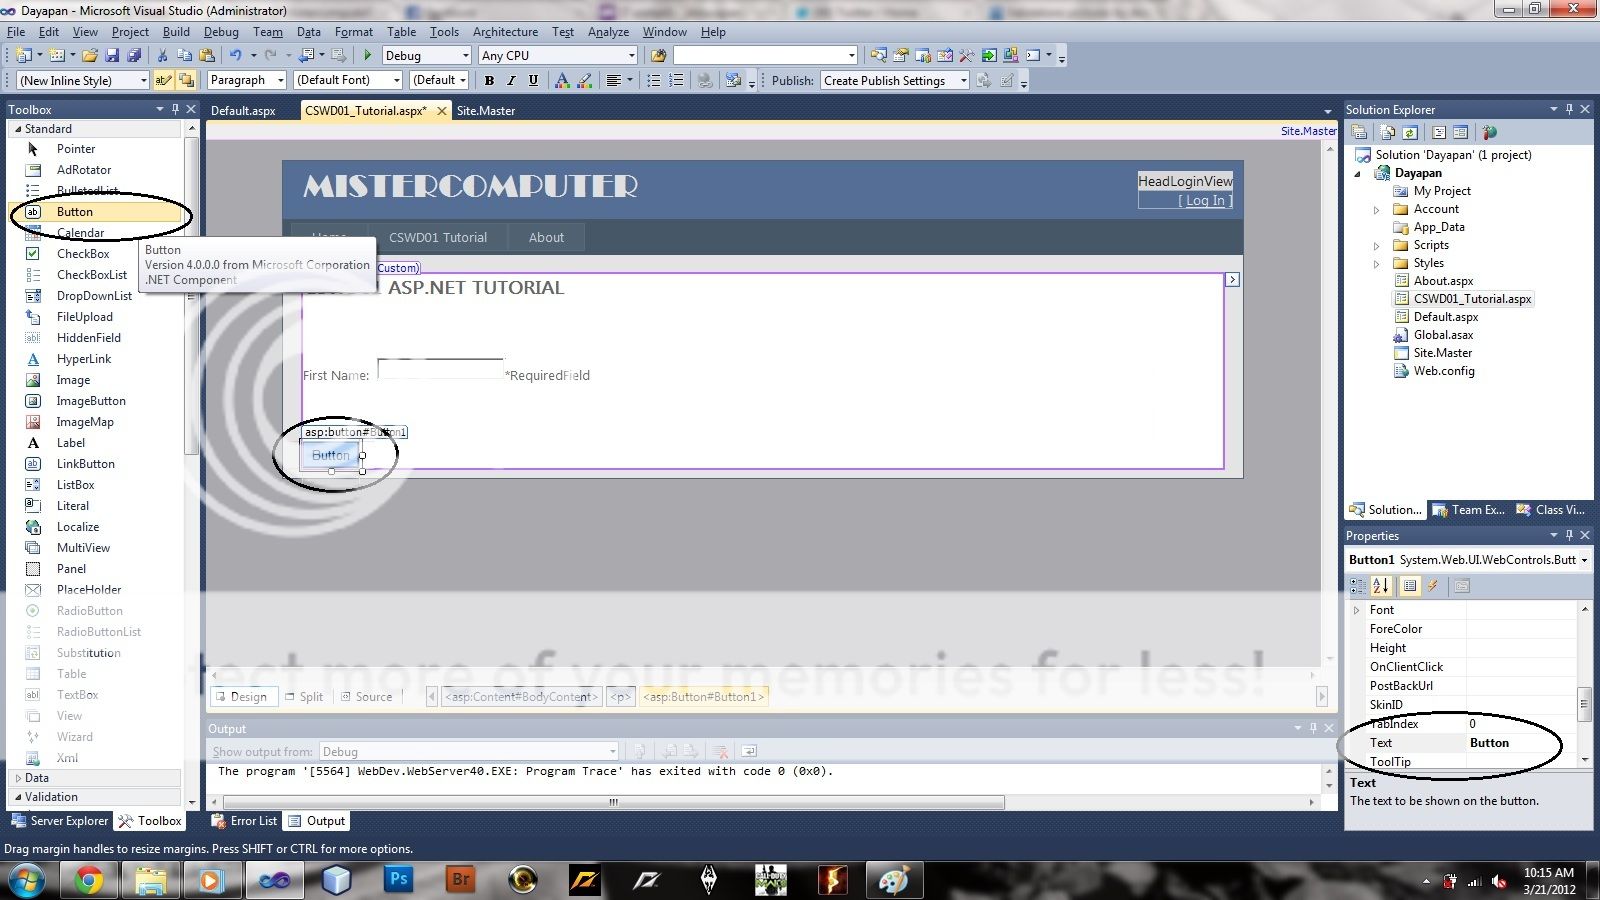
Now change the textproperty of the button to “SUBMIT”.

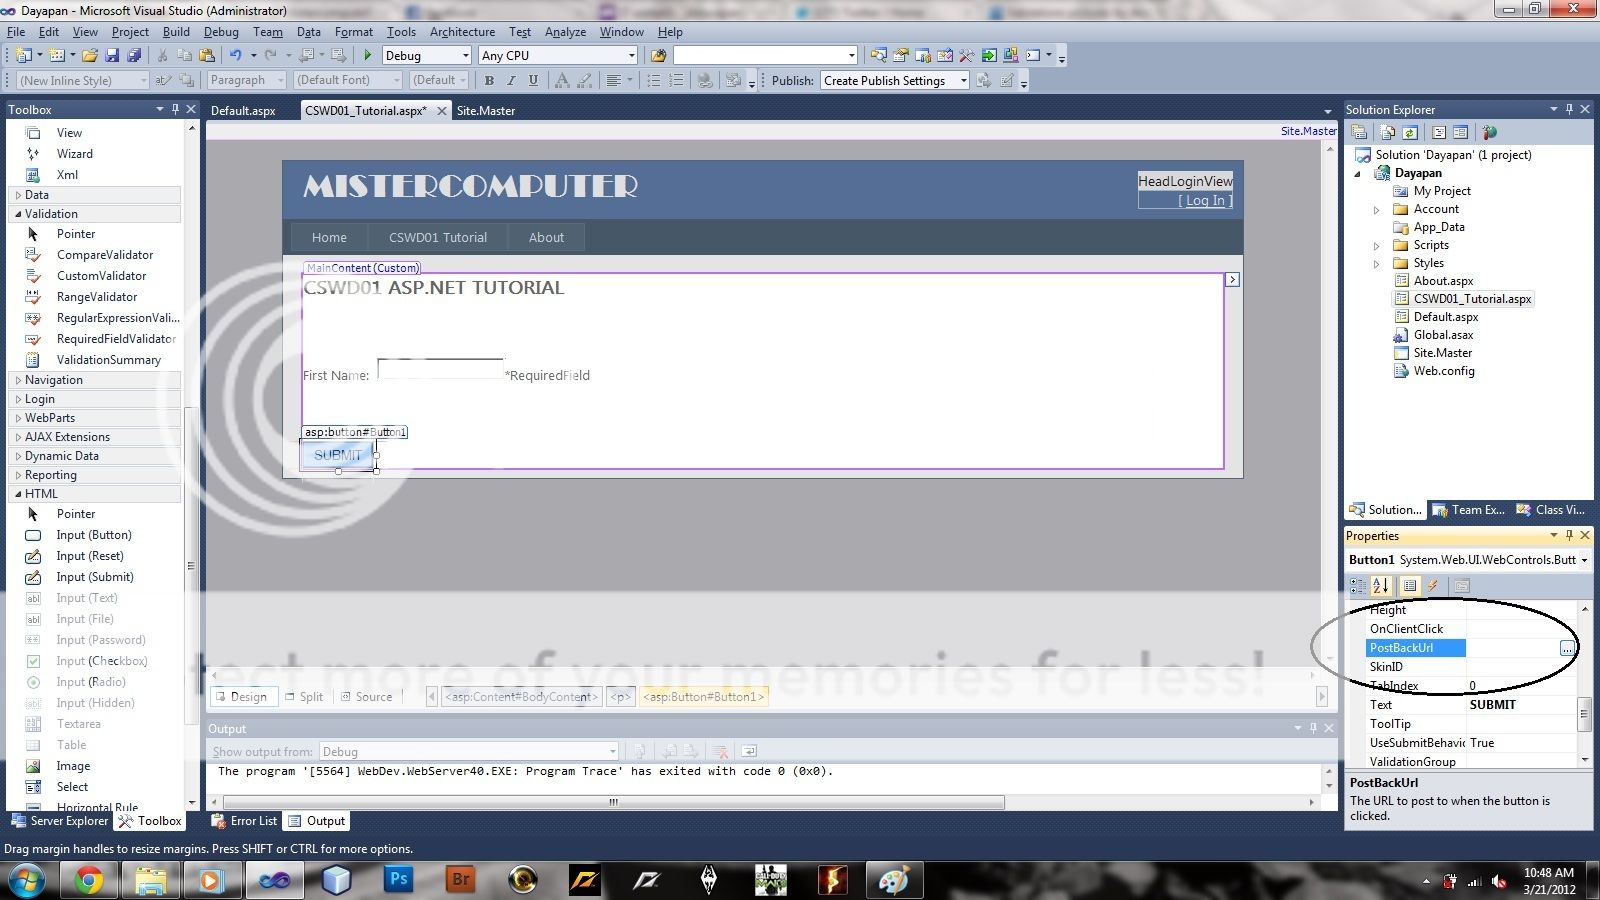
Also, to make sure that once we click the button, the validation will take effect just before showing up the next form, we will modify the PostBackUrl property of the Button to another .aspx file in our web app. In this tutorial, we will just use “Default.aspx”, so that when we clicked the button and the validation passes, the Default.aspx will show up.

Now try running the Web app and test if the validation works. If you leave your textbox with an empty value and clicked the button, the validation will show up right next to the textbox and the next page will not show up.

But if you entered a value and clicked the button, the Default.aspx will show up.

You can start self-studying other forms of validations like RangeValidator, CompareValidator, etc.
Now, CSWD01 P1, for your Finals MP1, modify the page and make it look like this:

You are free to add some more content and validations as long as the following are there.
|> At The Drive-in – One Armed Scissor
MILANOS | Black Shoes
Just recently, I bought a set of new black shoes from MILANOS. It’s genuinely leather but somehow seems to be synthetic at all. Despite that, the price just cost me P799.99 and I bought it at the nearest SM Department Store, with no discounts at all.

I will be using it today, as I go to Accenture’s HR Department this morning to apply for a job. I took a day of absence in school, and I wonder what my students are doing right now. This pair of black shoes will be my temporary replacement to my old Mario D’Boro shoes. I hope it last.
|> Avenged Sevenfold – Second Heartbeat
EVENT | Taylor Swift: Journey to Fearless DVD Launch
Even if the Speak Now DVD was launched earlier, here comes Journey to Fearless DVD by Taylor Swift. The DVD comes with more than 10 performances of Taylor Swift during her Fearless tour, as well as extra contents like digital photobook, behind-the-scenes and Taylor’s short biography. The DVD went on sale and launched by MCA and Oddysey on March 3, 2012, and that’s saturday so we’re there and joined the other swifties.

The event took place in SM Megamall’s Oddysey branch and swifties (or Taylor’s fans) are all expecting great time that moment. Games and prizes are all in! Well it’s funny to say, but I pushed my girlfriend that day just to make her join the contest. Fortunately for us, she did won a Taylor Swift Notebook.


By the way, The DVD came with a Taylor Swift stainless keychain as a freebie, as well as a Taylor Swift – Candie’s replica T-Shirt (if you pre-order The Hunger Games OST).

|> Rancid – Ruby Soho
ASP.NET | Part 2
1. So now we’ve got everything settled and we’re going to do the design of our website as of the moment. Once again, the first time you successfully setup your web application using the template in Visual Studio, the primary thing you will then see at first is the Source code of the Default.aspx file of your webpage.

You have the option to whether view the Default.aspx file’s Source code (by clicking the “Source” button below) or the Design view (by clicking the “Design” button below) or both (by clicking the “Split” button). In Source Code view, this is where you can program Visual Basic.Net/ASP.Net/HTML/CSS codes or any other that you can use within your web application. In Design view, however, you can use the usual easy-to-use drag-and-drop feature of the Visual Studio IDE. Instead of typing HTML codes over and over again, you can drag and drop HTML elements or modify their attributes through the Properties window on the lower right corner.

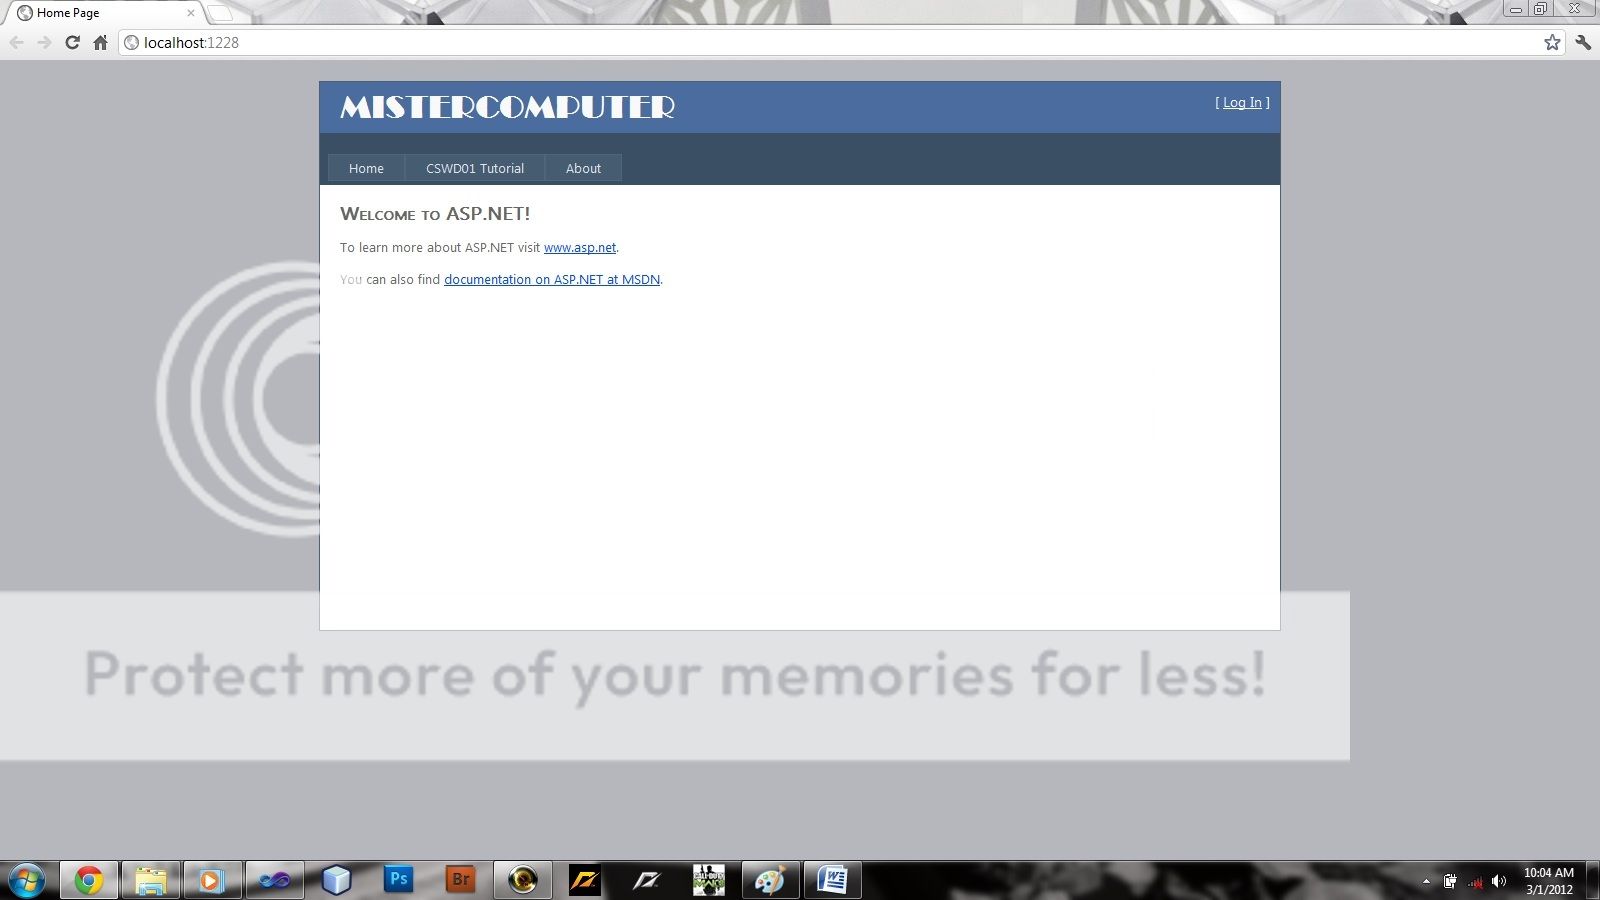
1.1. As you can see, there’s already a preloaded design on the web application we just created a while ago, thanks to the template we used. The web application that we just created is equipped with a blog-like theme template, that’s why there is a banner that says “MY ASP.NET APPLICATION”, as well as menu items like “Home” and “About”. Also, there are texts written on the body of the page which says “WELCOME TO ASP.NET”. We will try to modify them soon. In fact, we will be adding more menu items, plus their corresponding web pages.
1.2.First, we will modify the banner of our web application. Originally, the text “MY ASP.NET APPLICATION” is written on it. We will then try to change it to something more appropriate, depending on the theme of the website we are trying to make. And because this is a beginner’s tutorial, we will just change it to just a simple title of a website. For this tutorial, let’s use my wordpress blog’s title, MISTERCOMPUTER. For my students, please use any title you would like (take note, the title you will use should be connected to the content of your website).
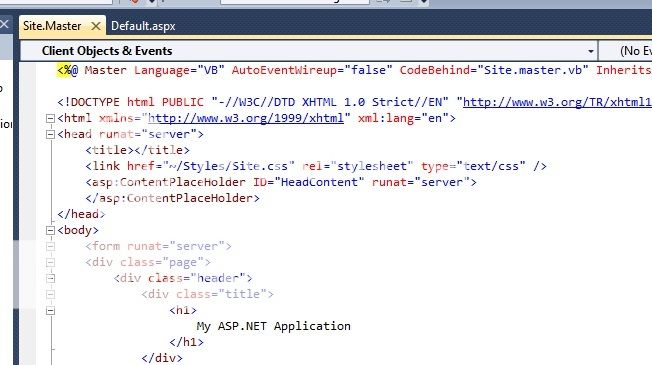
Now to change the banner’s text, we will open the Site.Master file from the Solution Explorer. The Site.Master file contains the codes of the banner.

Once you open the Site.Master file, Visual Studio will automatically show its codes. Take note that you can still view the Default.aspx file’s codes and design, by clicking on its tab menu on the upper left corner, right next to Site.Master file’s tab menu.
There are two ways on how to change the title banner of your web application. Any of the two methods gives the same result.
1.2a. In Design Mode, you can simply highlight on the “MY ASP.NET APPLICATION” text and rename it.


You can change font, font size, style, color, or any other formatting tools by using the toolbar located below the menu bar of the IDE, all of which will play a very useful role in your website’s appearance. For this example, I used the following style: Font=Broadway; Size=xx-large; Bold; All others set to the default. You can use your own preference for this.

1.2b. Alternatively, in Source view, you can use your HTML and CSS coding skills. Instead of just clicking listboxes, we can modify the property of the object by typing HTML codes and attributes. For those people not familiar with HTML, I do not recommend this method and stick with the first one, which is quite easier.
The highlighted text in the screenshot are the HTML codes of the title we just finished modifying. Apart from the HTML tag (which is used to make the text in Bold form), we do not see here the codes for the size and style of the text we just modified.

That is because; ASP.NET uses CSS (Cascading Style Sheets). CSS is used to as the container of the styles we use in particular elements of the website. CSS is a bit hard to understand, so for this tutorial, we will not use CSS, but HTML. To use HTML to modify the properties of the text, simply type the starting tag before the text, and the closing tag right after the text. Example: ![]() which makes the same result as method 1.
which makes the same result as method 1.
In Split mode:

1.3. Now since we have our title already set, the menus are our next objective. We will try to make things a lot easier. As you can see, there are already 2 preloaded Menu items in our web application, “Home” and “About”, respectively. In Source code, you will see HTML codes that says the following:

They are ASP.NET codes in nested form. Under , you see ASP.NET codes for MenuItem which has text value as “Home” and “About”. You can change the text from “Home” to, like, “Main” or something. We can also delete the whole HTML statement that means deleting that particular menu item. You can also see the NavigateUrl attribute of the MenuItem. By using NavigateUrl, you can redirect the the web application into a certain webpage once a user clicks on that menu item. For example, in our template we have a “Home” menu item that when a user clicks on it, the Default.aspx webpage will show up in the browser.
In this tutorial, we will not be deleting those two menu items, as they are common in most websites, as well as, they will play an essential role in our web application. Anyhow, you are free to rename them as you like, but please be cautious in the NavigateUrl attribute of each MenuItem.
1.4. Now let’s try to add another menu item. First, we should consider the particular web page that will open up once we click the new menu item. We will add another .aspx file in our projet. To do that, simply hover to Solution Explorer, right-click on your Project’s name (in our example, “Dayapan”),
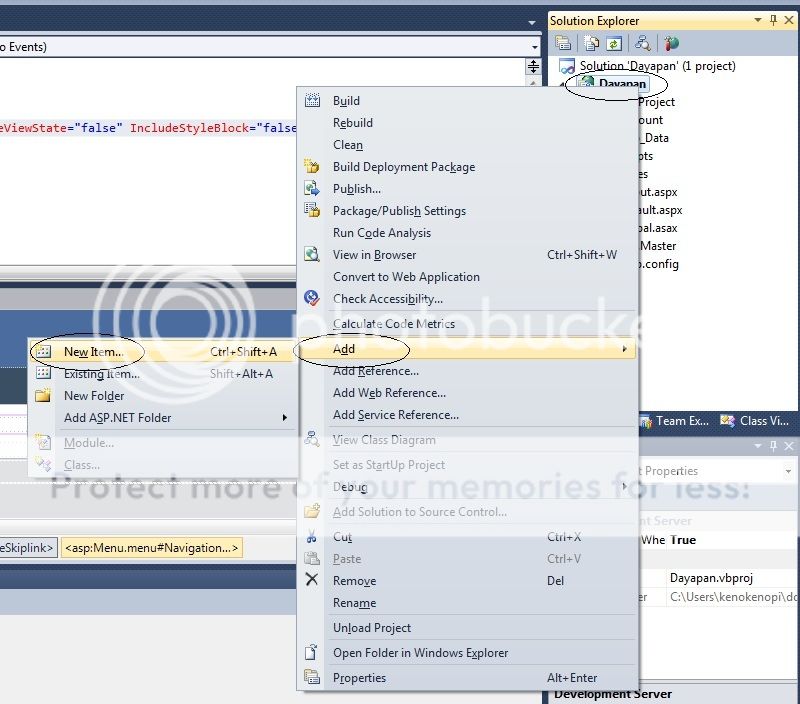
After clicking “New Item”, the Add New Item dialog box will show up. Choose the following options: Web Form; Name: CSWD01_Tutorial.aspx;

Don’t forget to click the Add button to add the new webpage to your project.
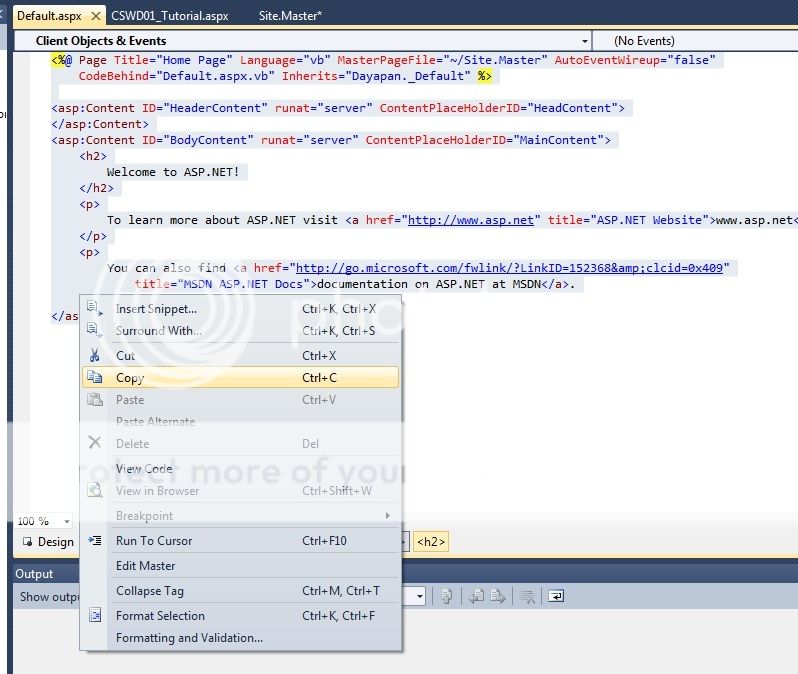
Next thing to do is to copy the existing codes of the Default.aspx to our newly added CSWD01_Tutorial.aspx webpage. We do this to make things easier; we do not need to start from the scratch. To do this, simply go to the Source View of Default.aspx and copy and paste its codes to CSWD01_Tutorial.aspx.
This will delete all the preloaded codes in CSWD01_Tutorial.aspx.
Now change the following codes:
![]()
To:
![]()
Also change the following codes:
Welcome to ASP.NET!
To:
CSWD01 ASP.NET Tutorial
Delete the following codes:
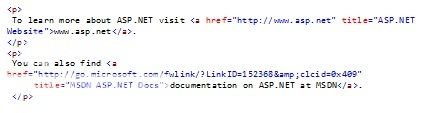
Coz’ we will try to add contents later on. Now if you follow my instructions properly, the Source view of CSWD01_Tutorial.aspx should look like this:

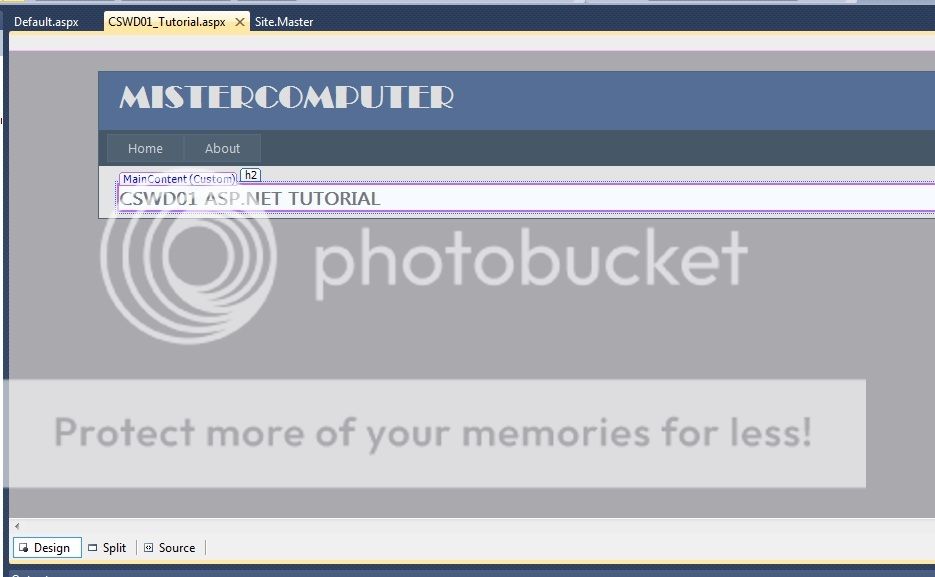
Design View:
Now that our newly created webpage is ready, the next thing to do is to create its menu item, and to link them together. To do that, follow the next instructions.
Back in Site.Master file, in Source View, copy and paste  below it, just before the codes for “About” menu item. Then change the codes to:
 ![]()
Your Site.Master codes should look like this:

And in Design view, it should look like this:

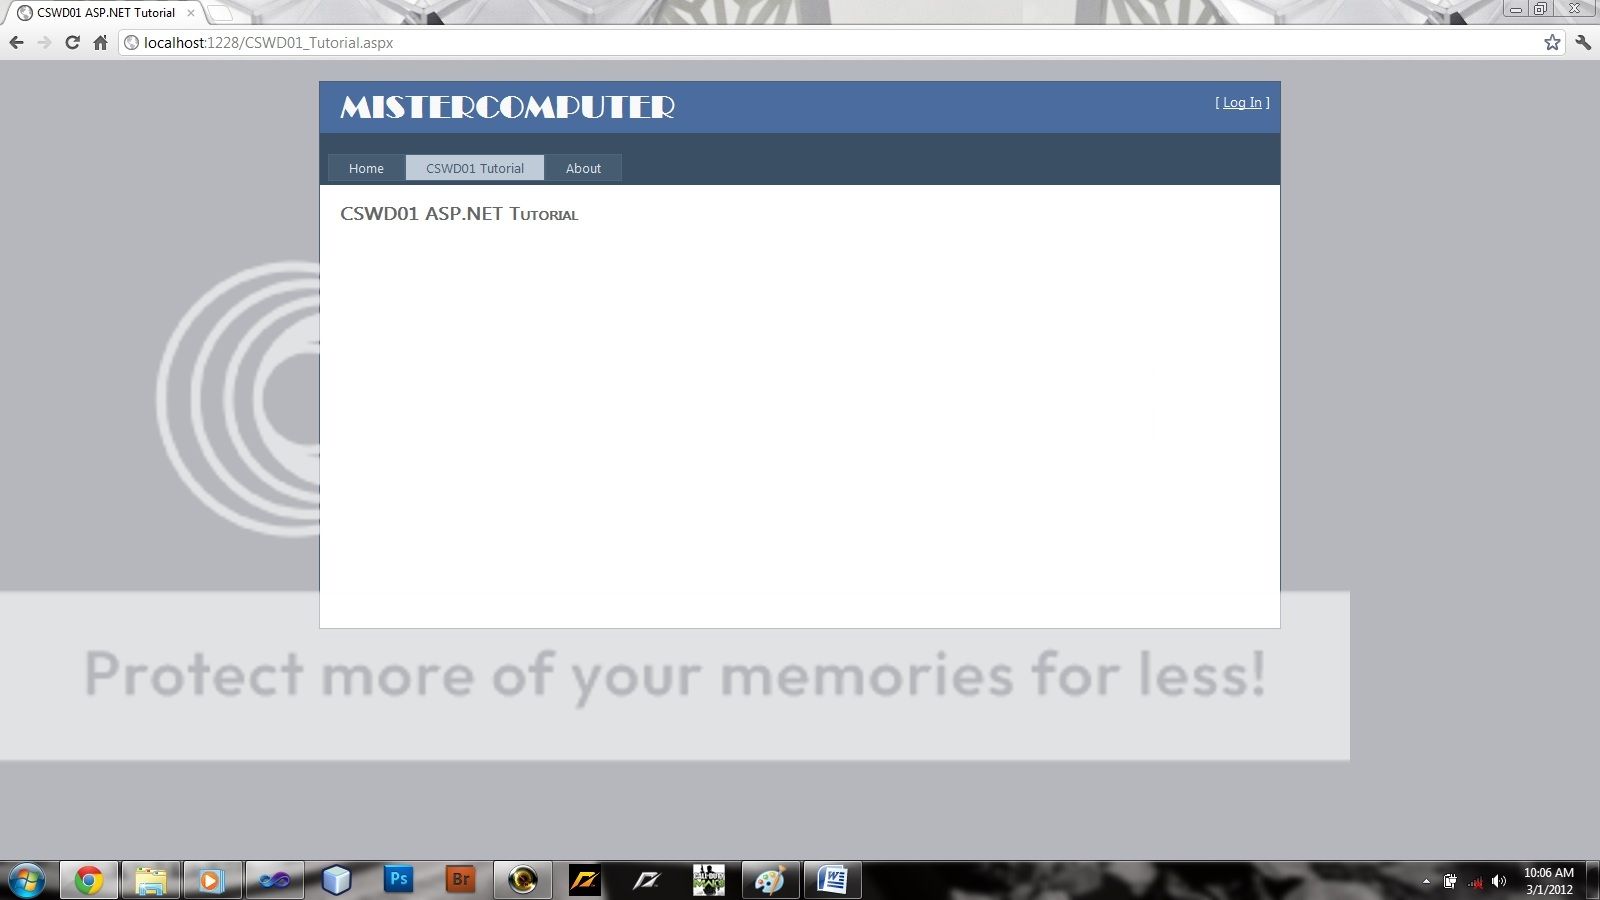
Notice that we have successfully added a new menu item in our web application, namely “CSWD01 Tutorial” in between the “Home” and “About” menu item. Optionally, you are free to name them as you like. Now let’s try to test if during runtime, when we click that menu item, the webpage that we created a while ago will show up. To do that, simply press the F6 button in your keyboard, and your browser will show up, plus the web application and the Home page.
Now click on the “CSWD01 Tutorial” menu item. If the webpage below (picture below) showed up, then that means you have successfully followed my instructions and learned simple ASP.NET design coding. If not, then you’ve made something wrong.
Now that’s the second part of the tutorial. You have learned to add webpages and menu items, so you are now free to work around your web application and try to experiment it yourself. You should also try to think of the theme of your website, whether you’re participating in ThinkQuest or not. The next thing we will do is to add more menu items and content. We will be filling out the Home and About pages. Til’ next time!
|> Incubus – Stellar


